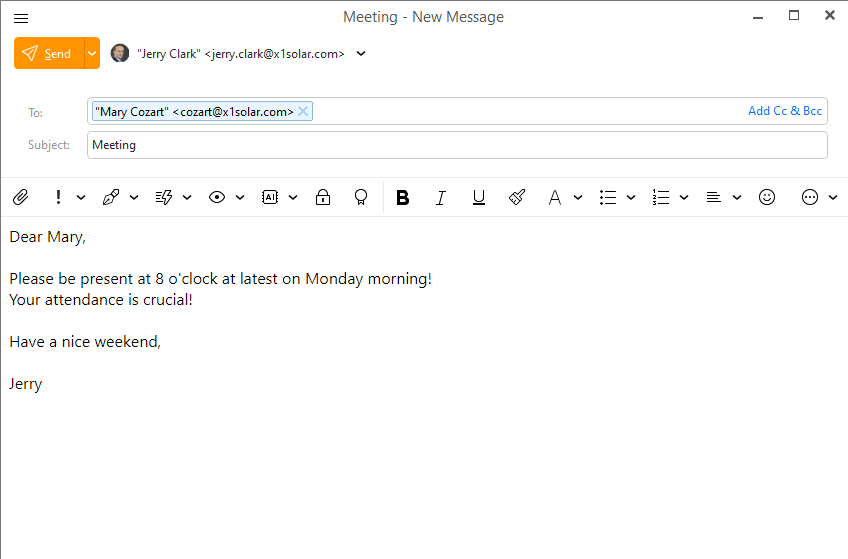
You can create new emails by clicking on the New button on the toolbar.
Notice that if you type in a contact that is paired with a Chat contact, you will be able to see whether this contact is online (green dot) or offline (red dot).
The roll-down menu after you click on the Menu button at the top of the email window will contain following options:
Send
You can insert several types of items, for example Inserting image as link will allow you to insert image that is uploaded on the Internet or you can Insert a table, parameters of which you can further specify.
Enter the recipient of this email here.
Enter a basic description of the Email.
You can click on  button to bring up two additional lines for:
Enter the email addresses you wish to send a copy of this email to.
Enter the email addresses you wish to send a blind copy of this email to. Recipients in To: and Cc: fields will not see this recipient, the copy is secret to all but you and the Blind copy recipient.
Components of toolbar are separated into two sections. First section concerns more with the elements of the message and the second part is more concerned with the editing of the message (Email Editor). The separation of the two sections is also indicated by the design of the email window itself.

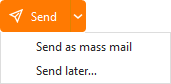
Click this button to send your email.
In the drop-down menu you can also select to send the message as Mass mail or to Send it later, if you use PRO version of eM Client.
You can choose an email account from which you want this email to be sent from (it is set to your default Email account by default).

You can add the attachments to your email by clicking on small paperclip icon.

Clicking this icon will set your email to be urgent .
Signature 
Click this button to choose the signature you wish to use for the message (you can set up your signatures in Settings - Signatures, or you can access the signatures management window by choosing the Manage option from the menu).

Click on this button to insert predefined QuickText of yours. For more information about how to create QuickText visit the QuickText settings section.

You can set up a notification either for when a reply to this message is received or if the recipient has not replied to your message in a specified amount of time.

Click to digitally sign your email with a security certificate so that the recipients can verify its authenticity. For more details refer to Signing and Encryption section.

Click to digitally encrypt the contents of your email with a security certificate saved in your eM Client, your system or uploaded to eM Keybook or other key lookup services. For more details refer to Security Certificates and how to configure security settings.


Bold - The selected text will be bold.
Italic - The selected text will be written in italic.
Underline - The selected text will be underlined.
Paint Format - Select certain area of the text while holding right mouse button, click on the Paint Format button, and then hover over different area of the text to transfer the format of the original text to the newly selected area.
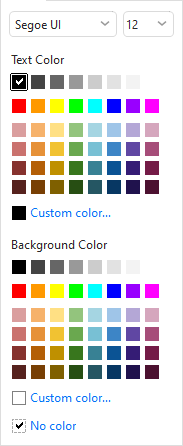
Font Style - click on the Font Style button to bring up following menu
Ordered list - create a numbered list
Unordered list - create a list of points

Left Align - justify the text to the left.
Center - justify the text to the center.
Right Align- justify the text to the right.
Justify Both Sides - justify the text on both sides
Emoticons - add emoticons, gifs or stickers to your email.
Click on the  button to bring up following additional features that could not fit in the toolbar:
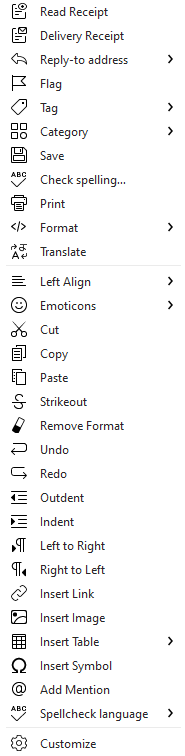
Read Receipt-Add read receipt to your email. Read receipt represents a notification that is delivered to you after the recipient opens your email
Delivery Receipt- Add delivery receipt to your email. Delivery receipts confirm that the email has been delivered to recipient's mailbox.
Reply to address - Set a different Reply-to address if you need the recipient to send a reply to different address than the one used for sending.
Tags- Mark your email with arbitrary colorful tag.
Save - Save the message to drafts
Check spelling.. - Open the Check spelling window
Format - Select Plaint text or HTML formatting for your message
Paint Format - Copies format from selected part of the text, then you can apply it to another selection
Cut - Cut a part of text to clipboard.
Copy - Copy a part of text to clipboard.
Paste - Paste the text from clipboard.
Remove Format- Remove all formats from selected text.
Undo - erase the last change done to your email.
Redo - repeats the most recently undid action.
Outdent - Move selected text to the left (if this text was indent before).
Indent - Move selected text to the right.
Left to Right
Right to Left
Insert Link - add a hyperlink to your email.
Insert Image- add an image to your email.
Insert Table - add a table to your email.
Insert Symbol - add a symbol to your email.
Spellcheck language - Change the spell check language
Customize- customize the layout of your email window.
Please note that you can customize what tools you want to have present on the toolbar by clicking on customize button from the roll down menu.